Install DXPR Builder on your Drupal site
Install DXPR Builder on a Drupal site you already run, add your product key and switch one content type to the builder. At the end you have a saved page that shows the builder, ready for your first element. Starting a new site instead? Installing DXPR CMS sets up the builder, theme and content types in one go.
The video on Installing on existing content types walks through steps 2 to 8 of the check at the end of this page.
Before you start
- Drupal 10.1 or later, including Drupal 11, with PHP 8.1 or later. Requirements lists the rest.
- Composer and Drush in your project.
- A product key. DXPR Builder needs one to work; find yours at dxpr.com/getting-started.
Install the module
-
Download DXPR Builder 3.x with Composer. Version 3 is published as beta releases, so allow them:
bash
composer require 'drupal/dxpr_builder:^3.0@beta'
A plain
composer require drupal/dxpr_builderinstalls the stable 2.x series instead. -
Enable the module:
bash
drush en dxpr_builder
Drush also enables the Key module and the core modules DXPR Builder needs: Field, Field UI, Views, Image and Block.
Add your product key
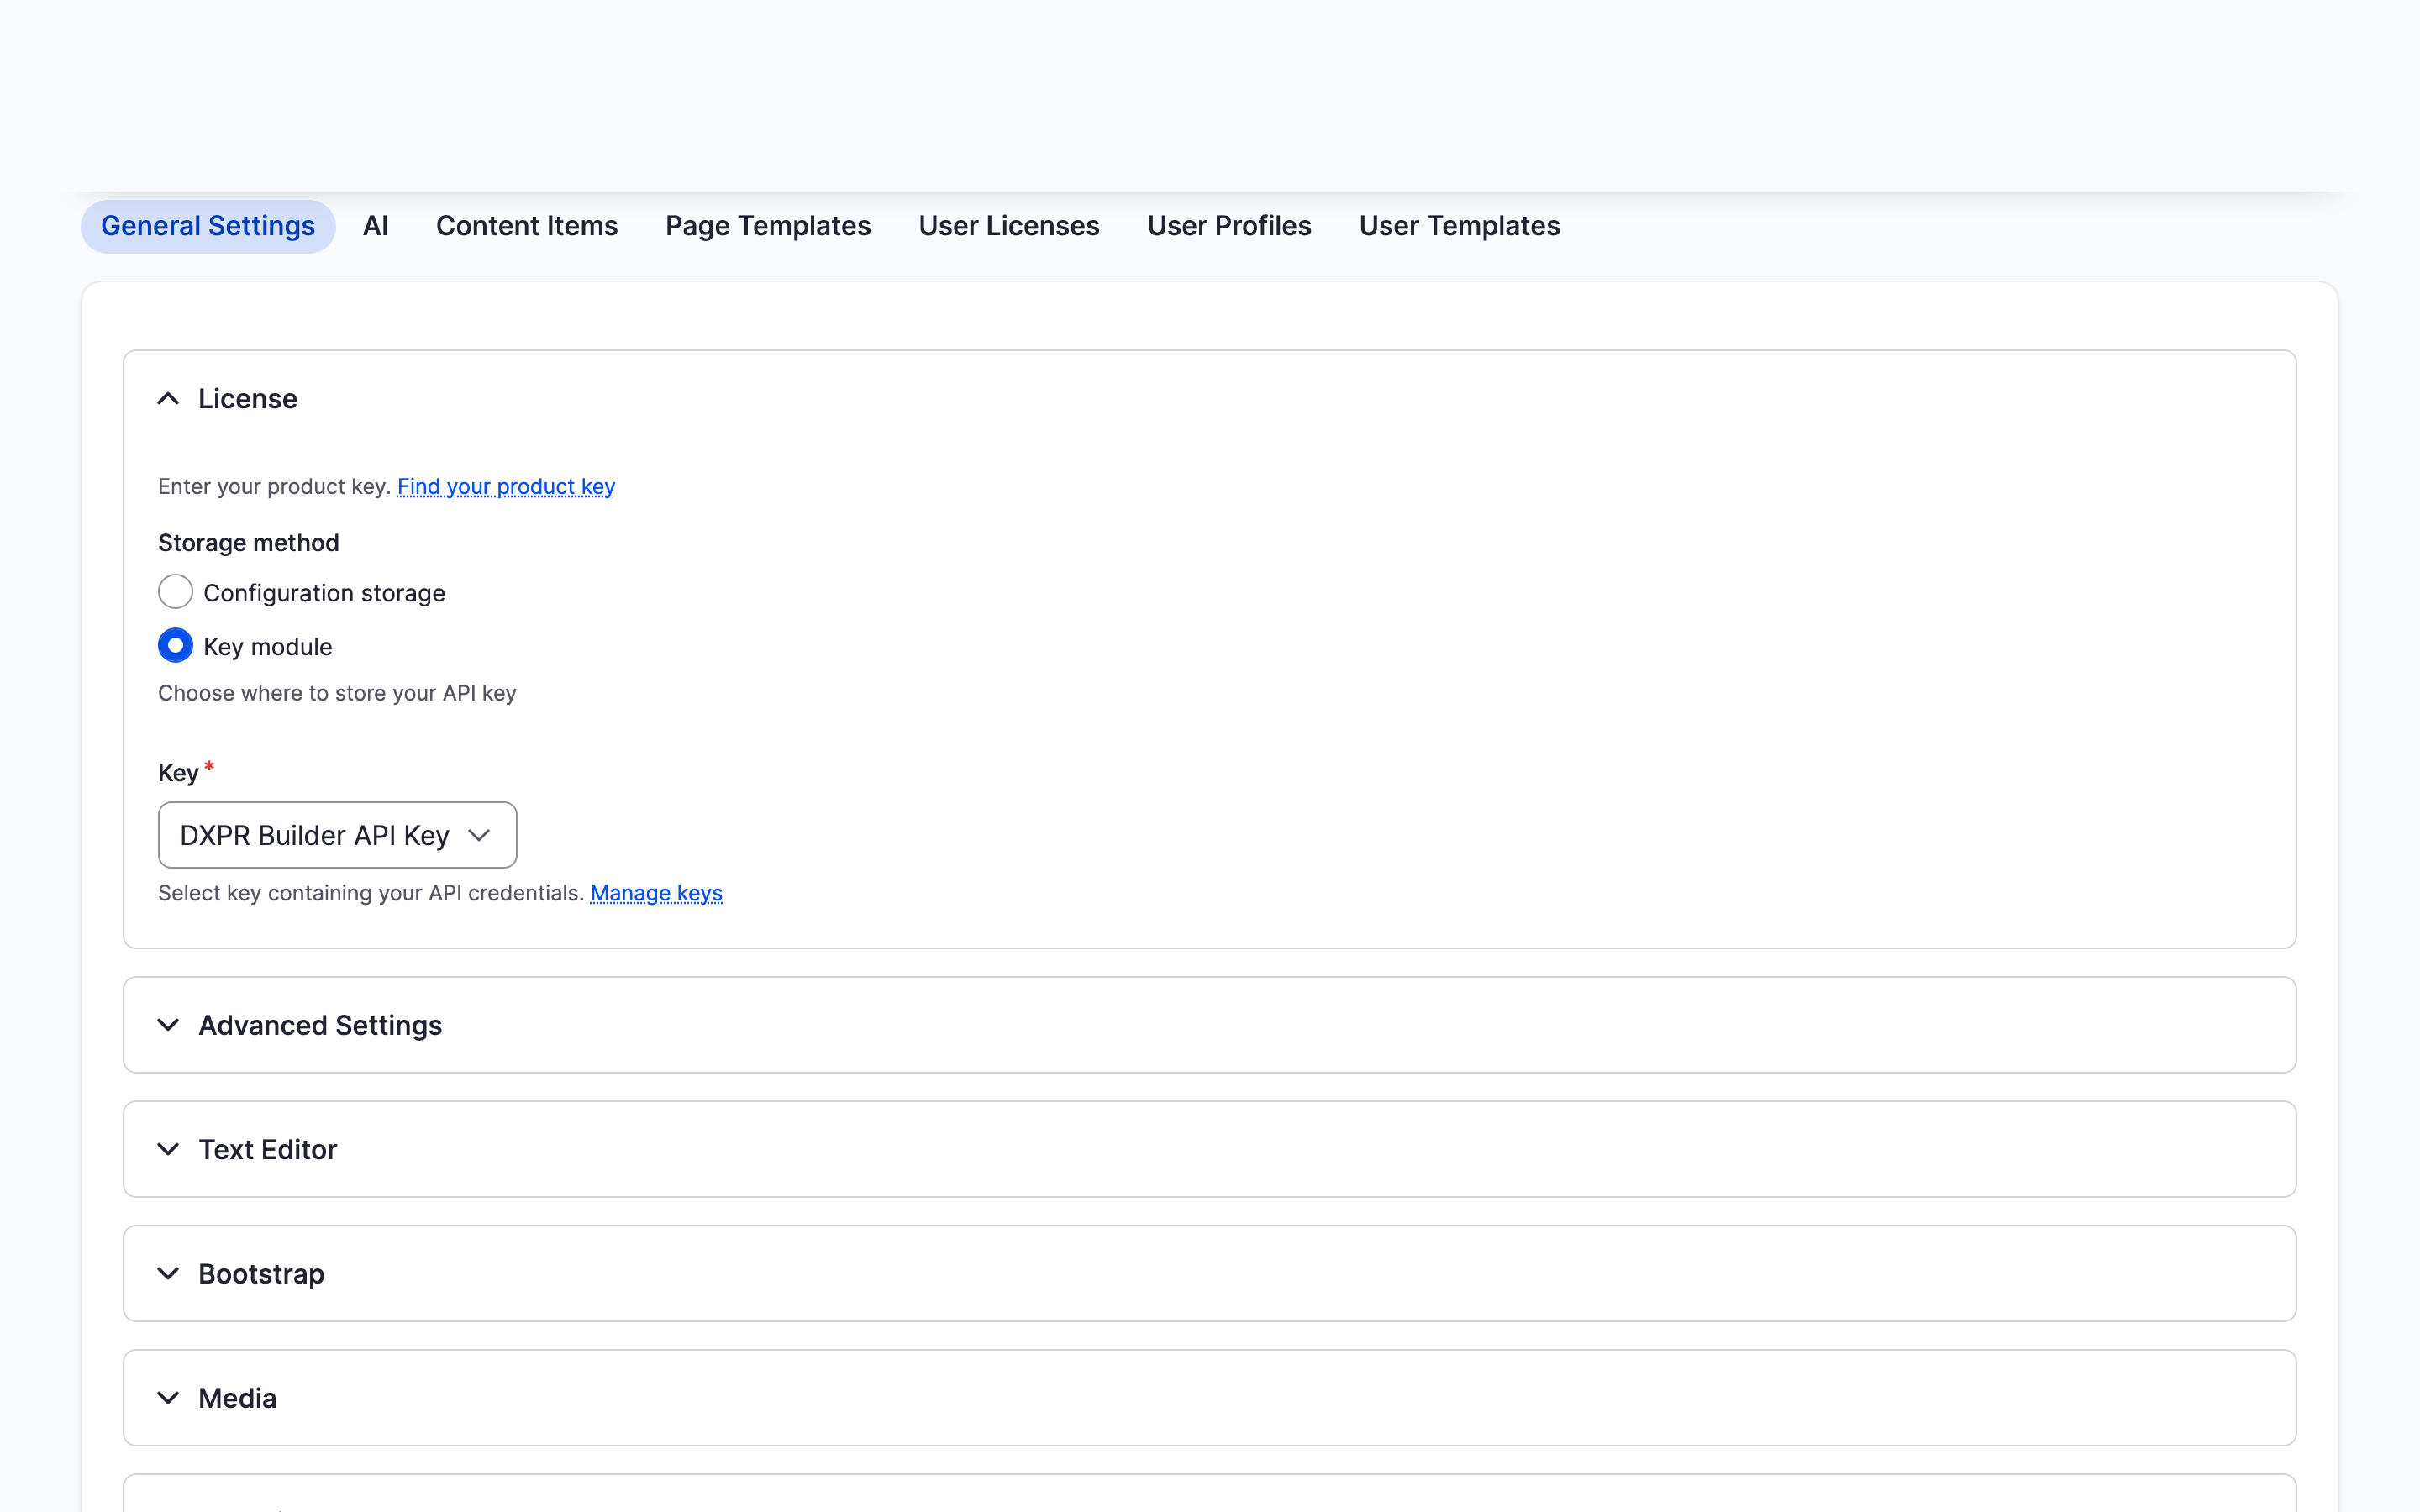
- Go to DXPR Studio > DXPR Builder > General Settings
(
/admin/dxpr_studio/dxpr_builder/settings). - In the License section, choose a Storage method.
- For Configuration storage, paste the key into Product key. For Key module, pick your key under Key.
- Click Save settings.
Configuration storage keeps the key in the site configuration, so it
ends up in configuration exports. Key module reads it from a key you
create first at /admin/config/system/keys. Give that key the File
or Environment provider to keep it out of exports as well.
Add submodules (optional)
DXPR Builder ships three submodules. Enable one with drush en and its
name.
| Submodule | What it adds | Needs |
|---|---|---|
dxpr_builder_page |
The Drag and drop Page content type, already set to the builder | The Field Group module |
dxpr_builder_block |
The Drag and Drop Block block type, for builder content in block regions | The core Block Content module, enabled first |
dxpr_builder_media |
A legacy media browser built on Entity Browser; hidden on the Extend page | Entity Browser and Inline Entity Form |
Most sites need no media submodule. When core Media Library is enabled at install time, the builder uses it. Otherwise choose it later under Media > Browser type on the settings page. Submodule architecture has the details.
Turn on AI features (optional)
AI page creation, AI text and AI images run through the AI module and the DXPR AI Provider.
-
Download both modules:
bash composer require drupal/ai drupal/ai_provider_dxpr -
Enable them:
bash drush en ai ai_provider_dxpr -
Go to
/admin/config/ai/providers/dxpr, pick the key that holds your product key under DXPR API Key, and save. - Go to
/admin/dxpr_studio/dxpr_builder/ai_settings. Under AI Features, all three boxes are ticked by default. Untick any feature you do not want.
The AI features guide explains each setting.
Verify the installation
The builder shows on content whose text field uses the DXPR Builder
formatter. These steps set it on a content type with a Body field.
The Drag and drop Page type from dxpr_builder_page is already set,
so there you can skip steps 2 to 5.
- Go to DXPR Studio > DXPR Builder > General Settings and check the License section for your product key.
- Go to Structure > Content types. Open the menu beside a content type with a Body field and click Manage display.
- If an overview of view modes opens, click Manage for Default.
- Change the Body Format to DXPR Builder.
- Click Save.
- Create content of that type and type a Title.
- Click Save.
- Hover over the content area. The DXPR Builder toolbar appears.
What you see
The saved page shows an empty builder where the body text would be. It offers an AI prompt, greyed out until AI is set up, plus Choose a template and Add Elements. Click Add Elements: the element picker opens with its Layout and Content tabs. DXPR Builder is working.
If you don't see the builder
- The page shows the body text, but no builder. The field still uses another formatter. Set its Format to DXPR Builder on the Default view mode under Structure > Content types > Manage display.
- The edit form shows a plain text area. DXPR Builder works on the saved page, not on the edit form. Save the content and open its page.
- The builder shows for the administrator only. Other roles lack the Edit with DXPR Builder permission. Grant it at People > Permissions (
/admin/people/permissions). - A second editor sees "Only one account can use DXPR Builder on the DXPR Free tier". The free tier allows one editor. Enter a product key from a paid subscription under License.
- An error says "Your product key is not valid". The DXPR CDN rejected the key. Paste the complete key again under License at
/admin/dxpr_studio/dxpr_builder/settings. - An error says "DXPR Builder cloud assets could not be loaded". The browser cannot reach
cdn2.dxpr.comorcdn.dxpr.com. Allow both hosts, as Firewall and data residency explains. - The AI prompt says "AI features require the AI module". The AI modules are not set up yet. Follow Turn on AI features, or untick the features under AI Features at
/admin/dxpr_studio/dxpr_builder/ai_settings. - Save settings reports "Invalid product key". The pasted text is not a whole key, or it is a key made for DXPR Builder 1.x. Copy your current key again, without spaces or line breaks.
The editor does not appear covers more causes.
What's next?
- Your first page: build a page from sections, rows and elements.
- Installing on existing content types: switch more content types, or add a builder field.
- Updating DXPR Builder: keep the module current and run
drush updatedbafter every update. - Test variations: A/B testing with the Reinforcement Learning module.