Change a photo with AI
Is your photo nearly right, but the light is dull or the background distracts? You describe the change and the AI edits the photo in place, without a separate image editor. Use this for a photo that is already on the page; to create a new one, see Generate an image with AI. The video turns a daytime team photo into a warm evening scene.
Before you start
- AI is switched on, with Enable image generation and Enable page creation assistant ticked. See Turn on AI in DXPR Builder.
- The photo sits in an Image element and is stored on your site, for example picked from the media library. SVG images and images from other websites cannot be edited.
Set up
- Point at the photo and click More on its control bar.
- Choose Edit with AI.
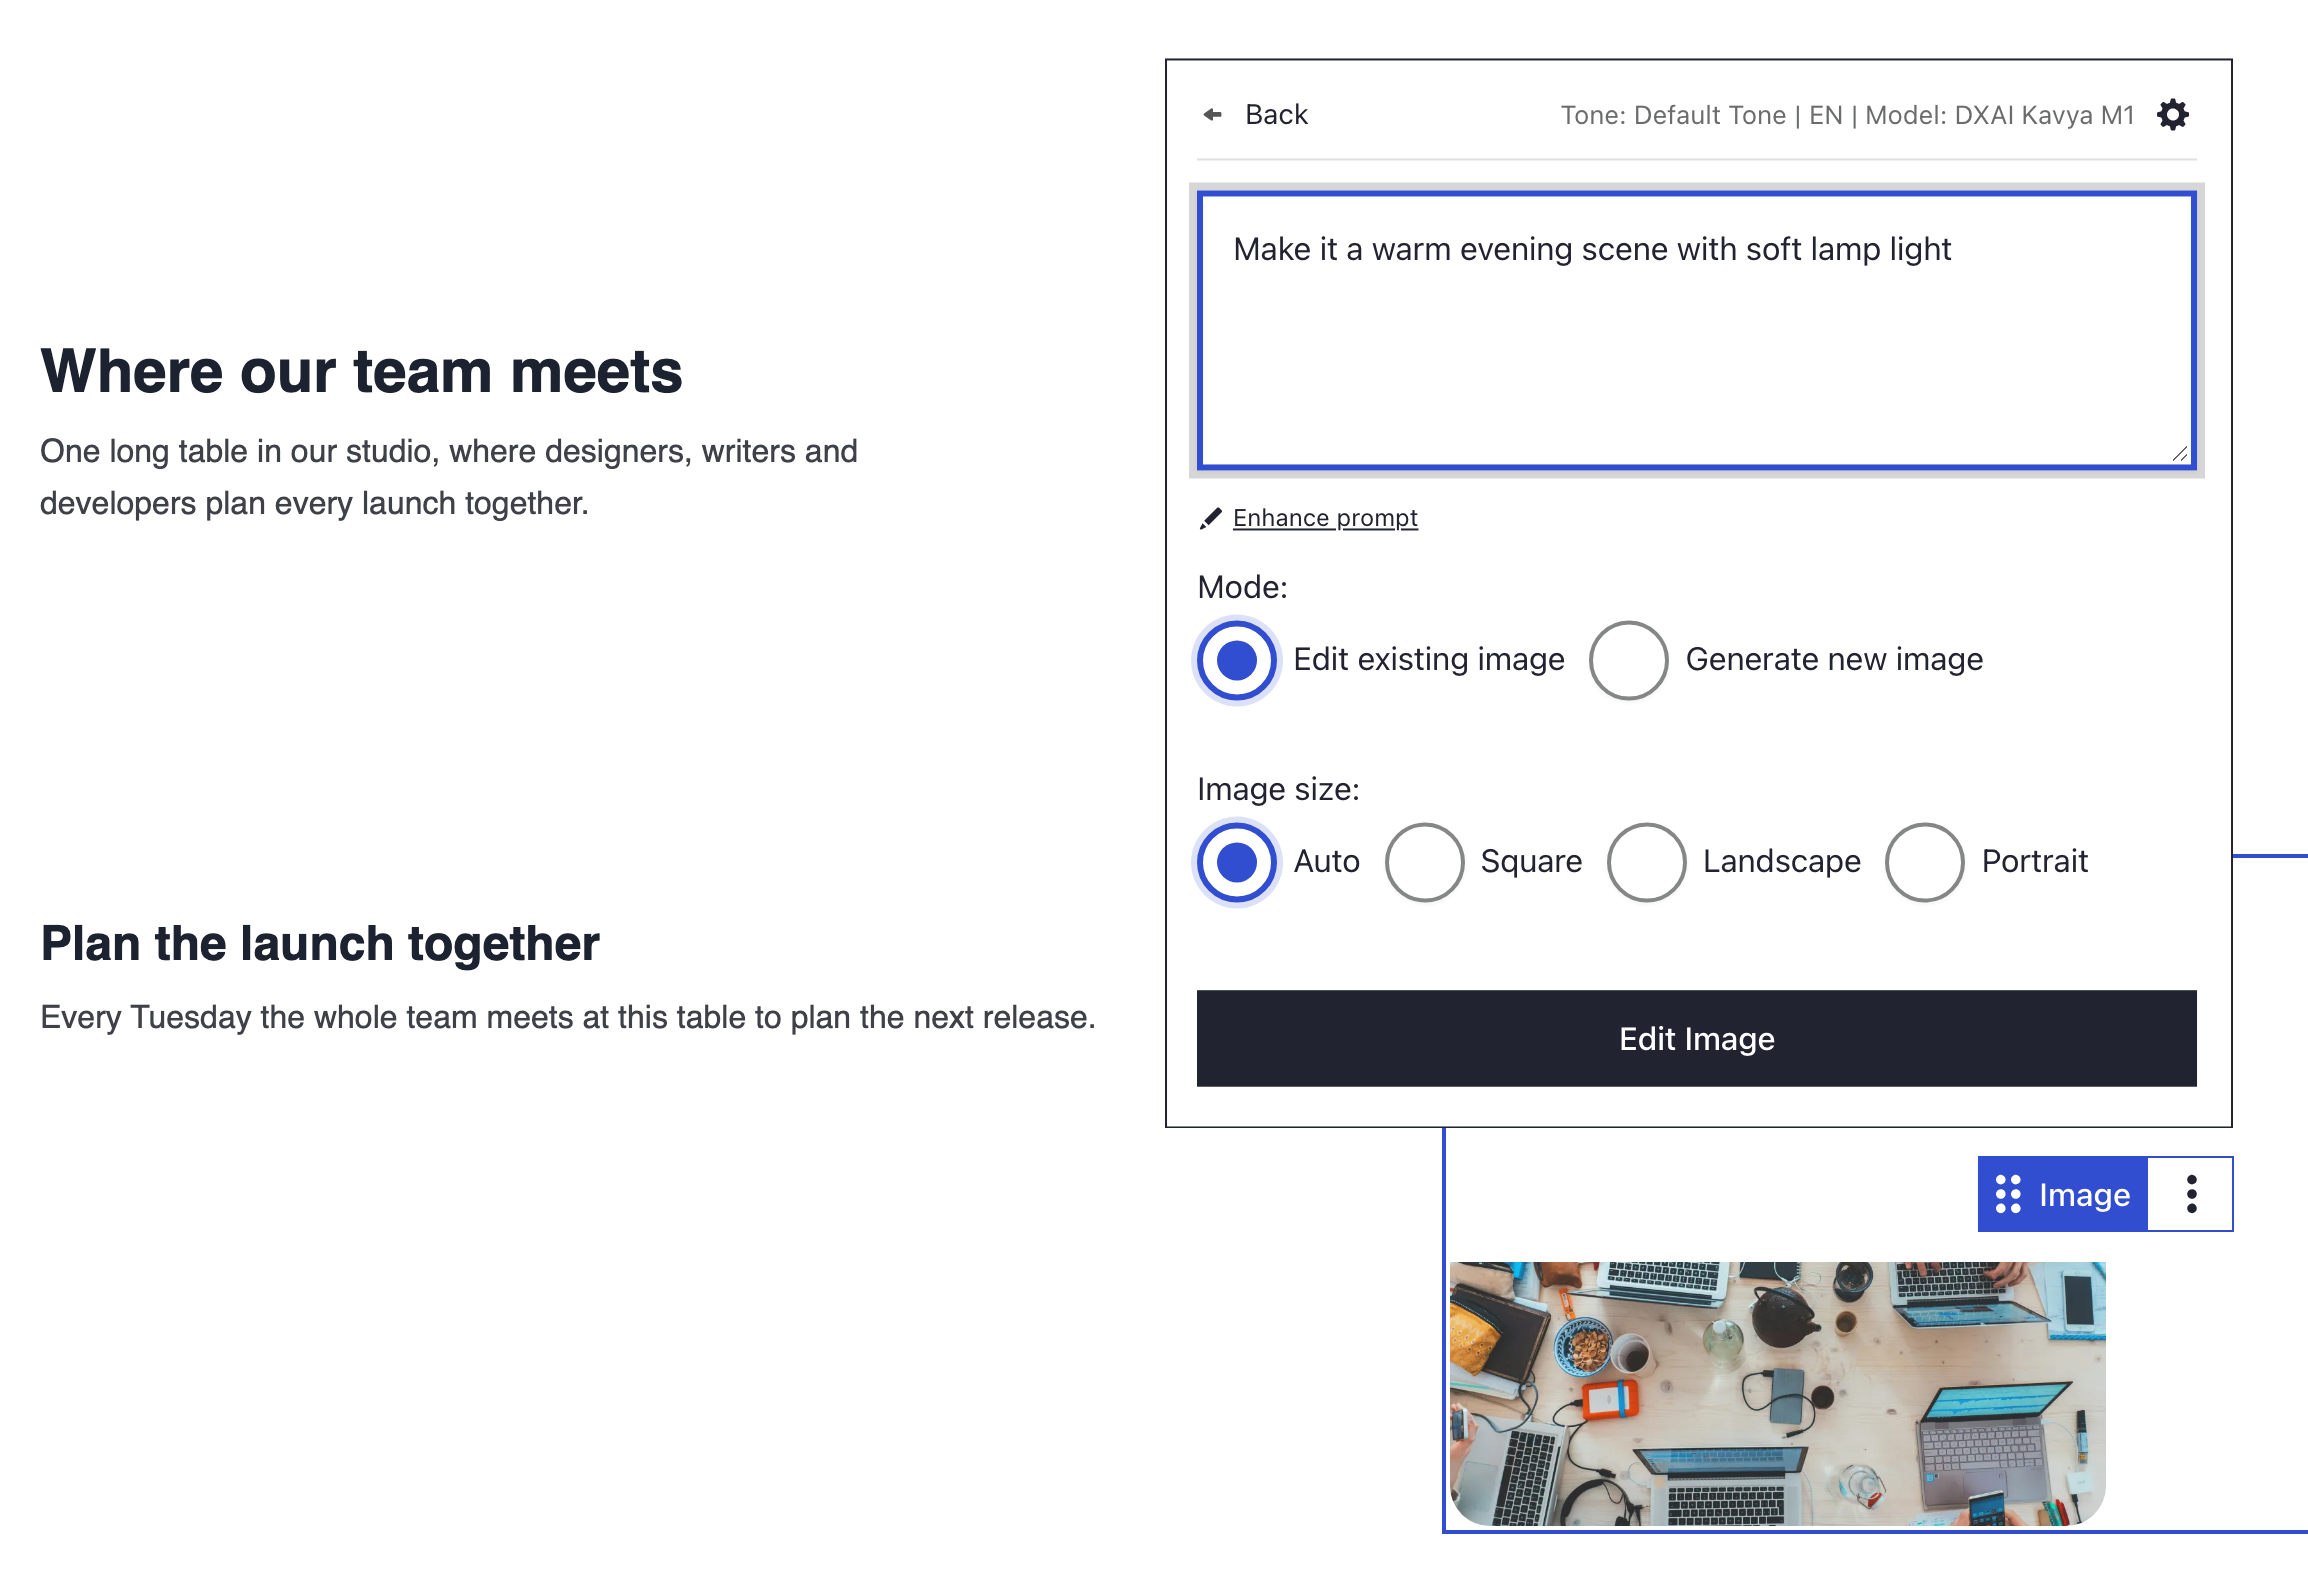
- Under Mode:, keep Edit existing image.
- Replace the text in the box with the change you want, for example "Make it a warm evening scene with soft lamp light".
- Click Edit Image.
- Click Save on the builder toolbar.
The box starts with the photo's alt text or the description it was generated from. Describe only the change, and say what must stay the same, for example "Keep the people and the table as they are".
What you see
The photo shows "Editing image..." while the AI works, which can take a minute. Then the edited version takes its place. With Image size: on Auto, the AI picks the shape, so a wide photo can come back square; choose Landscape to keep it wide.
The edited photo is saved as a new WebP image in your media library; the original stays there too. Prefer the old photo? Click the page and press Ctrl+Z (Cmd+Z on a Mac) to undo the edit.
Your instruction also becomes the photo's Alt attribute. Replace it with a plain description in the element's SEO settings, see Let AI write your alt text.
Instructions that work well
| You want to | Example instruction |
|---|---|
| change the light or the season | "Make it a bright spring morning" |
| calm a busy background | "Blur the background, keep the people sharp" |
| remove something | "Remove the coffee cups from the table" |
| change the style | "Turn the photo into a watercolour illustration" |
| change colours | "Make the walls light blue" |
If you don't see the edited photo
- The Mode: choice is missing and the button says Generate Image. The element has no photo, or the photo is an SVG or comes from another website. Pick a photo from your media library first.
- The More menu has no Edit with AI. Enable image generation or Enable page creation assistant is off. Tick both at
/admin/dxpr_studio/dxpr_builder/ai_settings. - The photo shows "Image editing failed. Please try again." DXPR could not edit the photo, for example because the account is out of credits or the instruction breaks the content rules. Click Retry, or Cancel and change the instruction.
- The old photo is back after reloading the page. The page was not saved. Edit again and click Save on the builder toolbar.
What's next?
- Let AI write your alt text: give the edited photo a proper description.
- Generate an image with AI: create a photo from scratch.
- Undo and redo: step back through your changes.